
实验目的:
实现LAMP搭建,nfs共享存储,并使用rsync主从同步
设备要求:
操作系统:centos7
ansible服务器:192.168.1.10 server01
httpd主:192.168.1.11 server02
httpd从:192.168.1.12 server03
nfs服务器:192.168.1.13 server04
安装
修改hosts


服务端(10)安装镜像源(至少配置epel)
wget -O /etc/yum.repos.d/CentOS-Base.repo https://mirrors.aliyun.com/repo/Centos-7.repo
sed -i -e '/mirrors.cloud.aliyuncs.com/d' -e '/mirrors.aliyuncs.com/d' /etc/yum.repos.d/CentOS-Base.repo
wget -O /etc/yum.repos.d/epel.repo http://mirrors.aliyun.com/repo/epel-7.repo
yum makecache
yum -y install ansible
ansible --version
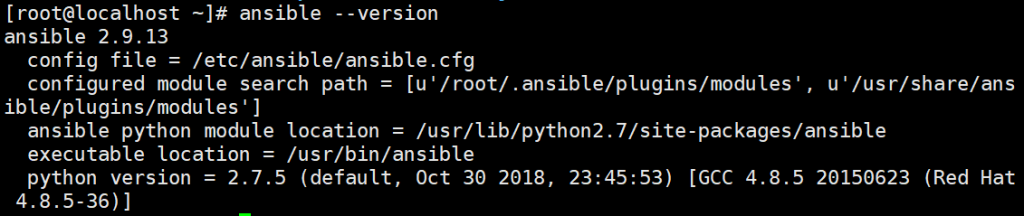
配置文件在 /etc/ansible/ansible.cfg (可以根据优先级修改)
配置模块查找路径在 /root/ansible/plugins/modules,执行时可以查看到
python版本不能大于等于3,否则失效
在家目录下创建清单列表,建立在hosts文件中
mkdir /root/project ; vim /root/project/hosts
[servers]
server0[1:3]
[webserver:vars]
ansible_ssh_pass='123'
这里使用匹配方式合并主机名或IP
基于密钥方式控制服务端
ssh-keygen -t rsa -P '' -f ~/.ssh/id_rsa
ssh-copy-id -i ~/.ssh/id_rsa.pub root@192.168.1.11
ssh-copy-id -i ~/.ssh/id_rsa.pub root@192.168.1.12
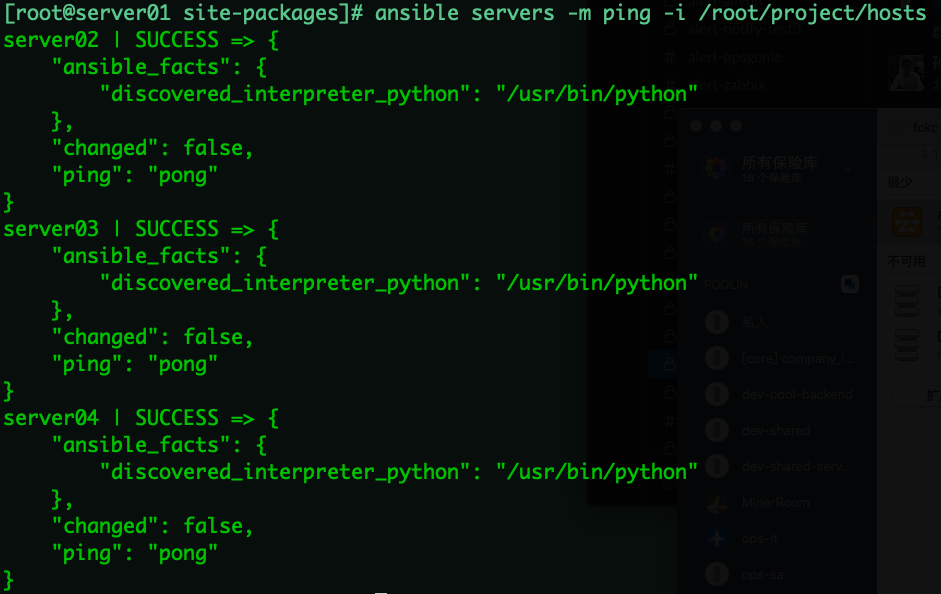
ssh-copy-id -i ~/.ssh/id_rsa.pub root@192.168.1.13测试连通性:
ansible servers -m ping -i /root/project/hosts
搭建httpd mariadb
vim lamp.yaml
- hosts: 192.168.1.11
  tasks:
#使用yum安装httpd、php、maridb、firewalld、unzip、MySQL-python等
    - name: Install httpd php php-mysql mariadb mariadb-server
      yum: name=httpd,php,php-mysql,mariadb,mariadb-server,unzip,MySQL-python state=present

#启动httpd,mariadb、firewalld服务
    - name: service httpd server
      service: name=httpd state=started

    - name: service mariadb server
      service: name=mariadb state=started

    - name: service firewalld server
      service: name=firewalld state=started
#添加防火墙规则,放行http的流量
    - name: configure firewalld
      firewalld: port=80/tcp immediate=yes state=enabled

#使用get_url下载php测试页面
    - name: get url ceshi.php
      get_url:
        url: http://fj.xuliangwei.com/public/index.php
        dest: /var/www/html/ceshi.php
#discuz下载解压到指定目录
    - name: unzip discuz
      unarchive: src=./Discuz_X3.3_SC_UTF8.zip dest=/var/www/html/ mode=0777
#变更权限为httpd进程的运行用户(apache)
    - name: Chown Directory
      file: path=/var/www/html owner=apache group=apache recurse=yes
#初始化mysqlroot登录权限
    - name: mysql-login
      mysql_user:
        name: "root"
        password: "123"
        update_password: always

#创建数据库
    - name: create application database
      mysql_db:
        login_host: "localhost"
        login_password: "123"
        login_port: "3306"
        name:
          - discuzdb
        encoding: utf8
        state: present
把Discuz_X3.3_SC_UTF8.zip下载到当前目录,然后执行
ansible-playbook lamp.yaml
搭建nfs
vim nfs.yaml
#开启rpcbind
    - name: start rpcbind
      service: name=rpcbind state=started
#开启nfs
    - name: start nfs
      service: name=nfs state=started enabled=yes
#检测nfs是否开启,如果开启重启
  handlers:

    - name: Restart NFS
      service: name=nfs state=restarted

#客户端配置
- hosts: 192.168.1.12
  tasks:
#下载nfs-utils
    - name: install nfs
      yum: name=nfs-utils state=present
#创建挂载目录/nfsdir
    - name: client create nfs data
      file: path=/nfsdir state=directory
#挂载
    - name: client mount nfs server
      mount:
        src: 192.168.1.11:/data
        path: /nfsdir
        fstype: nfs
        opts: defaults,_netdev
        state: mounted

- hosts: 192.168.1.13
  tasks:

    - name: install nfs
      yum: name=nfs-utils state=present

    - name: client create nfs data
      file: path=/nfsdir state=directory

    - name: client mount nfs server
      mount:
        src: 192.168.1.11:/data
        path: /nfsdir
        fstype: nfs
        opts: defaults,_netdev
        state: mounted
vim exports.j2
/data 192.168.1.0/24(rw,sync,no_all_squash)执行ansible-playbook nfs.yaml
搭建rsync
vim rsync.yaml
---
#服务器端
- hosts: 192.168.1.11
  tasks:
    - name: yum -y install rsync
      yum: name=rsync state=present
#创建rsync用户
    - name: useradd rsync
      user: name=rsync shell=/sbin/nologin
#创建rsync备份目录
    - name: mkdir /backup
      file: path=/backup state=directory owner=rsync group=rsync recurse=yes
#将本地配置文件发送到服务端
    - name: scp rsync.conf.j2
      copy: src=./rsyncd.conf.j2 dest=/etc/rsyncd.conf backup=yes
#创建服务端密码验证文件
    - name: touch rsync.password
      copy: content='rsync_user:123' dest=/etc/rsync.password owner=root group=root mode=600
#开启rsyncd服务
    - name: systemctl start rsyncd
      service: name=rsyncd state=started enabled=yes

#客户端操作
- hosts: 192.168.1.12
  tasks:
#安装rsync服务
    - name: yum -y install rsync
      yum: name=rsync state=present
#创建密码登录文件
    - name: touch rsync.pass
      copy: content='123' dest=/etc/rsync.pass owner=root group=root mode=600

- hosts: 192.168.1.13
  tasks:
    - name: yum -y install rsync
      yum: name=rsync state=present

    - name: touch rsync.pass
      copy: content='123' dest=/etc/rsync.pass owner=root group=root mode=600
vim rsyncd.conf.j2
uid = rsync
gid = rsync
use chroot = yes
max connections = 200
pid file = /var/run/rsyncd.pid
timeout = 900
ignore errors
list = false
fake super = yes
read only = false
############################
[backup]
  comment = welcome to backup
  auth users = rsync_user
  path = /backup
secrets file = /etc/rsync.password执行ansible-playbook rsync.yaml
搭建redis(可选)
---
- hosts: 192.168.1.11,192.168.1.12,192.168.1.13
  tasks:
#获取阿里云镜像源
    - name: get aliyun mirrors
      get_url:
        url: https://mirrors.aliyun.com/repo/Centos-7.repo
        dest: /etc/yum.repos.d/CentOS-Base.repo

    - name: get aliyun repo
      get_url:
        url: http://mirrors.aliyun.com/repo/epel-7.repo
        dest: /etc/yum.repos.d/epel.repo

    - name: makecache
      yum: update_cache=yes

#安装镜像
    - name: yum -y install redis
      yum: name=redis state=present

#变量注册,确保redis先开启
    - name: check redis server
      shell: "hostname -I"
      register: check_redis_ip

    - name: debug redis variables
      debug:
        msg: "{{ check_redis_ip.stdout }}"

#获取facts值,使用template解析本地配置文件变量和对方服务器信息发送到对应服务器端
    - name: configure redis
      template: src=redis.conf.j2   dest=/etc/redis.conf

#开启redis服务
    - name: service start redis
      service: name=redis state=started
      notify: restart redis

  handlers:
    - name: restart redis
      service: name=nfs state=restarted
获取一个redis.conf默认配置文件并修改
vim redis.conf.j2

执行ansible-playbook redis.yaml
发布者:LJH,转发请注明出处:https://www.ljh.cool/5244.html