
ELK介绍和JDK1.8环境搭建
链接: https://pan.baidu.com/s/1OmtreJTS-nQ8oELPXJHV2A
提取码: g7qa
实战环境
- 链接:https://www.elastic.co/downloads/logstash
- yum install java-1.8.0-openjdk -y
- Elasticsearch、Logstash依赖于java环境
- Jdk1.8二进制包下载路径http://www.oracle.com/technetwork/java/javase/downloads/jdk8-downloads-2133151.html
- 解压到对应安装目录/usr/local/或者/opt/
- 验证安装/usr/local/jdk1.8.0_201/bin/java -version
tar -zvxf jdk-8u201-linux-x64.tar.gz
export JAVA_HOME=/usr/local/jdk1.8.0_201/
export PATH=$PATH:$JAVA_HOME/bin
export CLASSPATH=.:$JAVA_HOME/lib/tools.jar:$JAVA_HOME/lib/dt.jar:$CLASSPATH
source /etc/profile

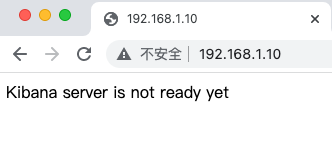
Kibana二进制安装和启动
安装Kibana
tar -zxf kibana-6.6.0-linux-x86_64.tar.gz
mv kibana-6.6.0-linux-x86_64 /usr/local/kibana-6.6.0
修改Kibana配置/usr/local/kibana-6.6.0/config/kibana.yml
#elasticsearch.url: "http://localhost:9200"
#elasticsearch.username: "user"
#elasticsearch.password: "pass"
- 前台启动Kibana:/usr/local/kibana-6.6.0/bin/kibana
- 后台启动Kibana:nohup /usr/local/kibana-6.6.0/bin/kibana >/tmp/kibana.log 2>/tmp/kibana.log &
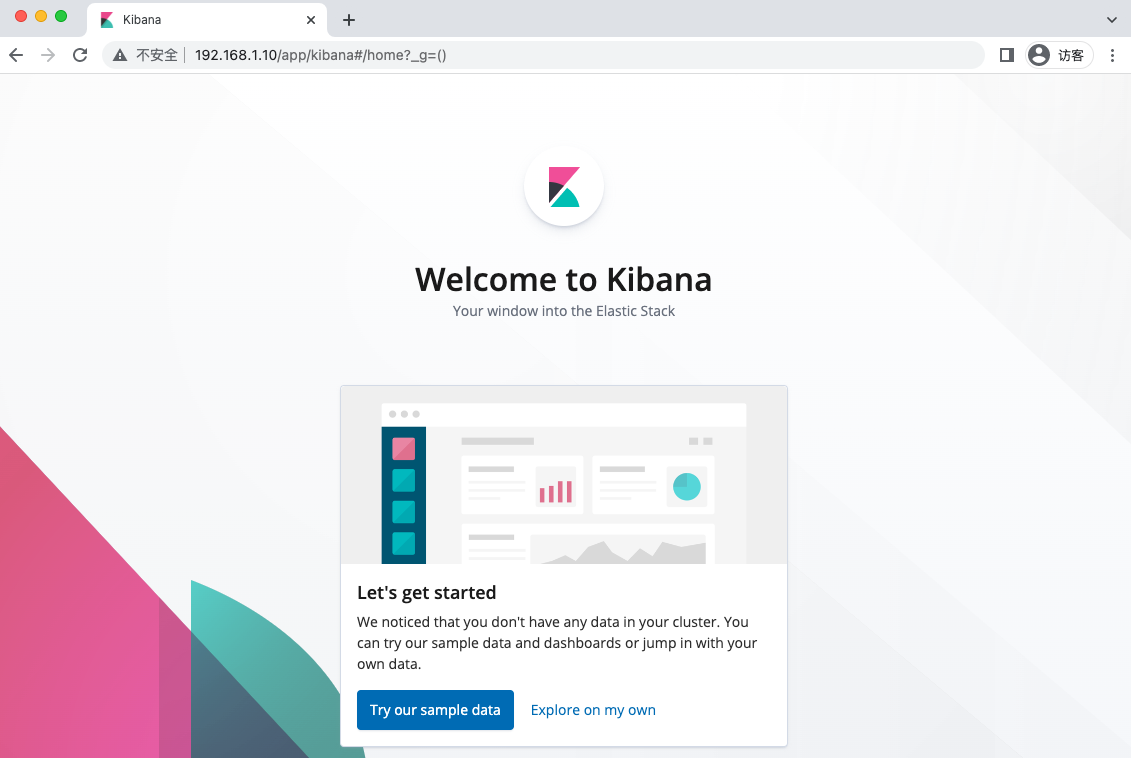
- 访问Kibana,需要开放5601端口
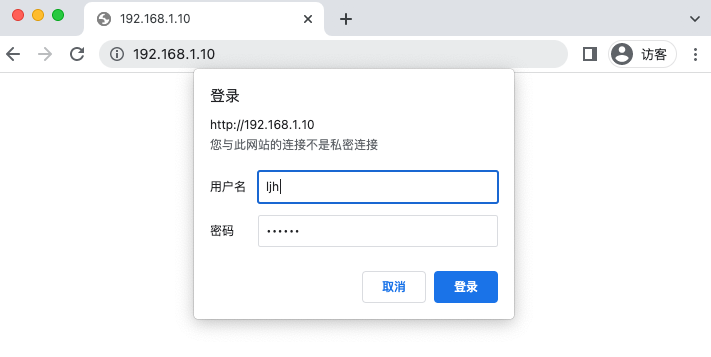
Kibana借用Nginx来实现简单认证
yum install -y lrzsz wget gcc gcc-c++ make pcre pcre-devel zlib zlib-devel
wget 'http://nginx.org/download/nginx-1.14.2.tar.gz'
./configure --prefix=/usr/local/nginx && make && make install


Nginx两种限制
Nginx限制源IP访问(/usr/local/nginx/conf/nginx.conf)
    log_format  main  '$remote_addr - $remote_user [$time_local] "$request" '
                      '$status $body_bytes_sent "$http_referer" '
                      '"$http_user_agent" "$http_x_forwarded_for"';
    access_log  logs/access.log  main;
    server {
       listen       80;
       location / {
           allow 127.0.0.1;
           deny all;
           proxy_pass http://127.0.0.1:5601;
       }
    }
location / {
            auth_basic "elk auth";
            auth_basic_user_file /usr/local/nginx/conf/htpasswd;
            proxy_pass http://127.0.0.1:5601;
        }
printf "ljh:$(openssl passwd -1 ljhpwd)\n" >/usr/local/nginx/conf/htpasswd
Elasticsearch二进制安装和启动
tar -zxvf elasticsearch-6.6.0.tar.gz
mv elasticsearch-6.6.0 /usr/local/
Elasticsearch配置/usr/local/elasticsearch-6.6.0/config/elasticsearch.yml
path.data: /usr/local/elasticsearch-6.6.0/data
path.logs: /usr/local/elasticsearch-6.6.0/logs
# JVM的内存限制更改/usr/local/elasticsearch-6.6.0/config/jvm.options
如果使用root启动会报错

监听在0.0.0.0或者内网地址
vi /usr/local/elasticsearch-6.6.0/config/elasticsearch.yml

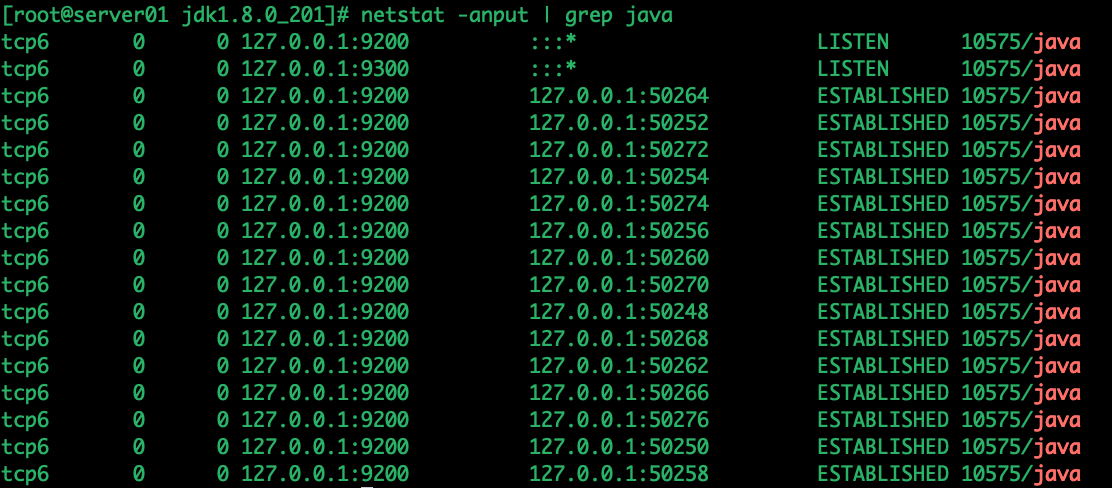
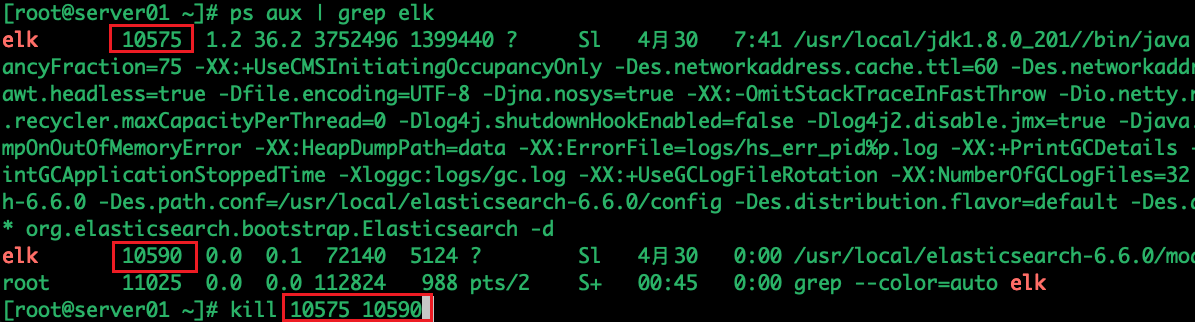
ps aux | grep elk
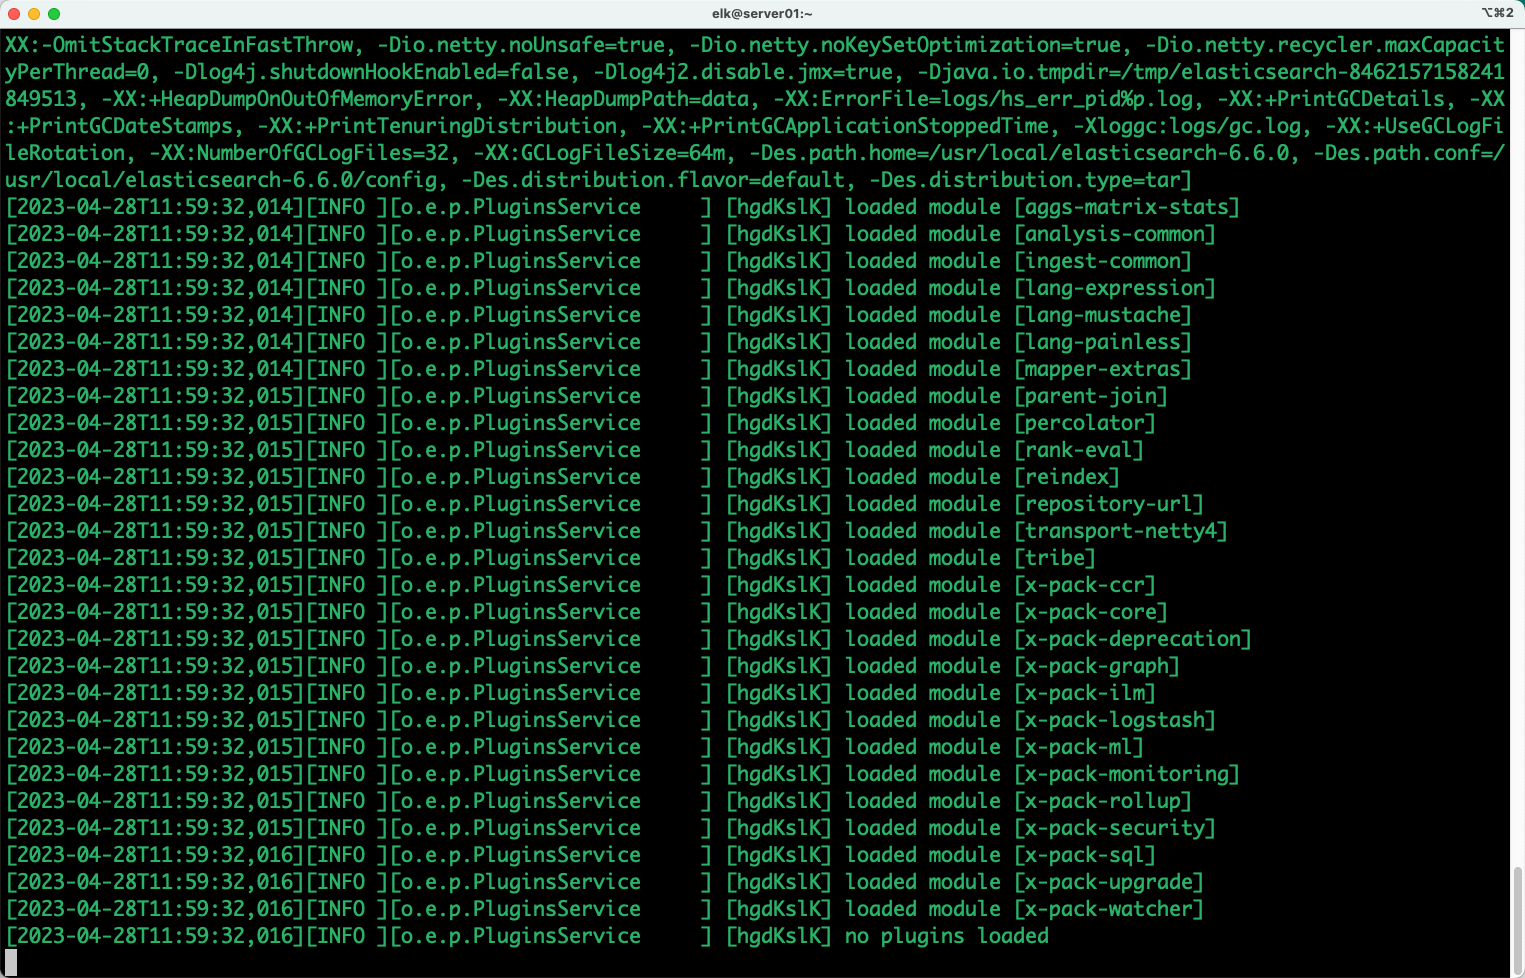
/usr/local/elasticsearch-6.6.0/bin/elasticsearch -d
[1]: max file descriptors [4096] for elasticsearch process is too low, increase to at least [65536]
[2]: max number of threads [3829] for user [elk] is too low, increase to at least [4096]
[3]: max virtual memory areas vm.max_map_count [65530] is too low, increase to at least [262144]
最大文件打开数调整/etc/security/limits.conf
62 * - nofile 65536
最大打开进程数调整/etc/security/limits.d/20-nproc.conf
全部修改成这一个参数

sysctl -p

退出终端重新登录ELK用户开启
/usr/local/elasticsearch-6.6.0/bin/elasticsearch -d
tail -f /usr/local/elasticsearch-6.6.0/logs/elasticsearch.log
Elasticsearch的基本操作
Elasticsearch的概念

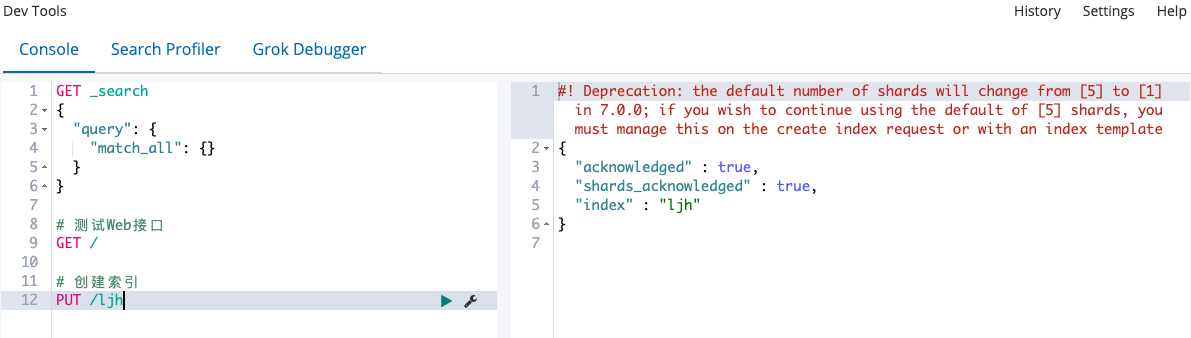
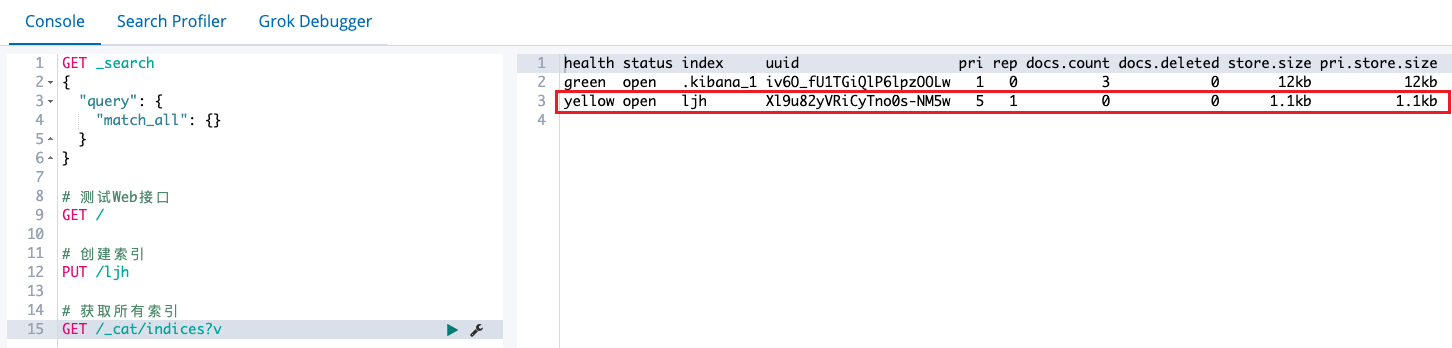
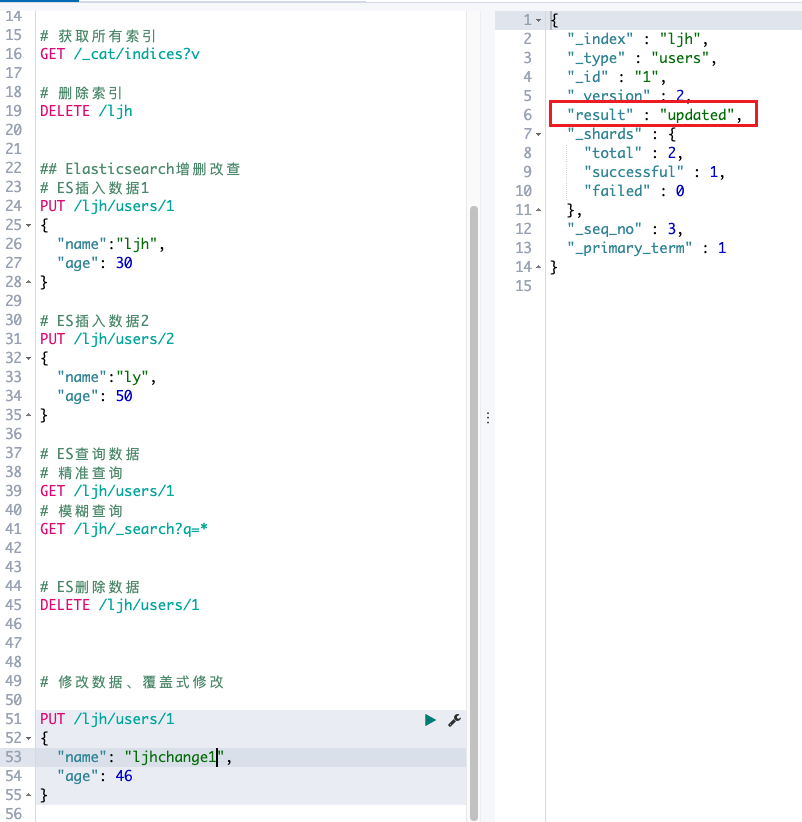
- 删除索引: DELETE / ljh

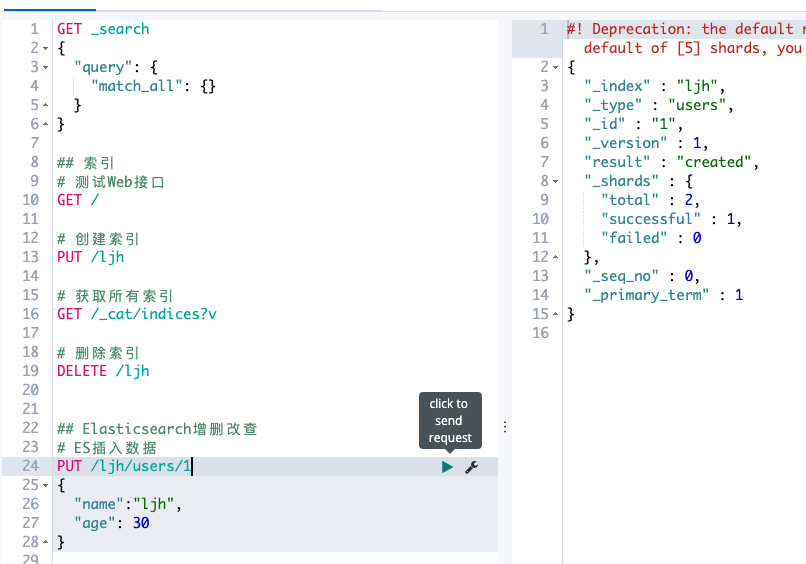
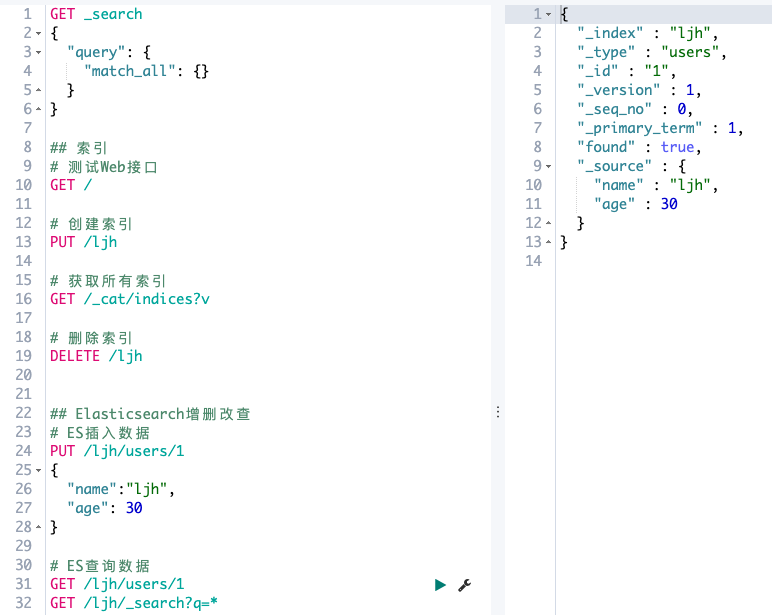
PUT /ljh/users/1
{
  "name":"ljh",
  "age": 30
}
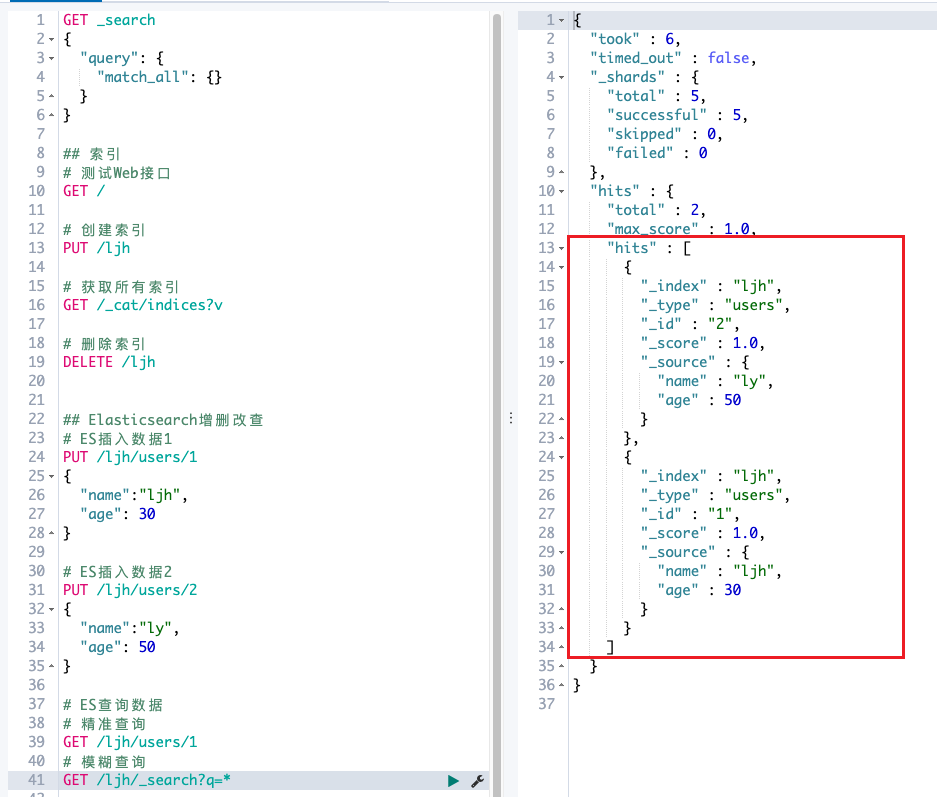
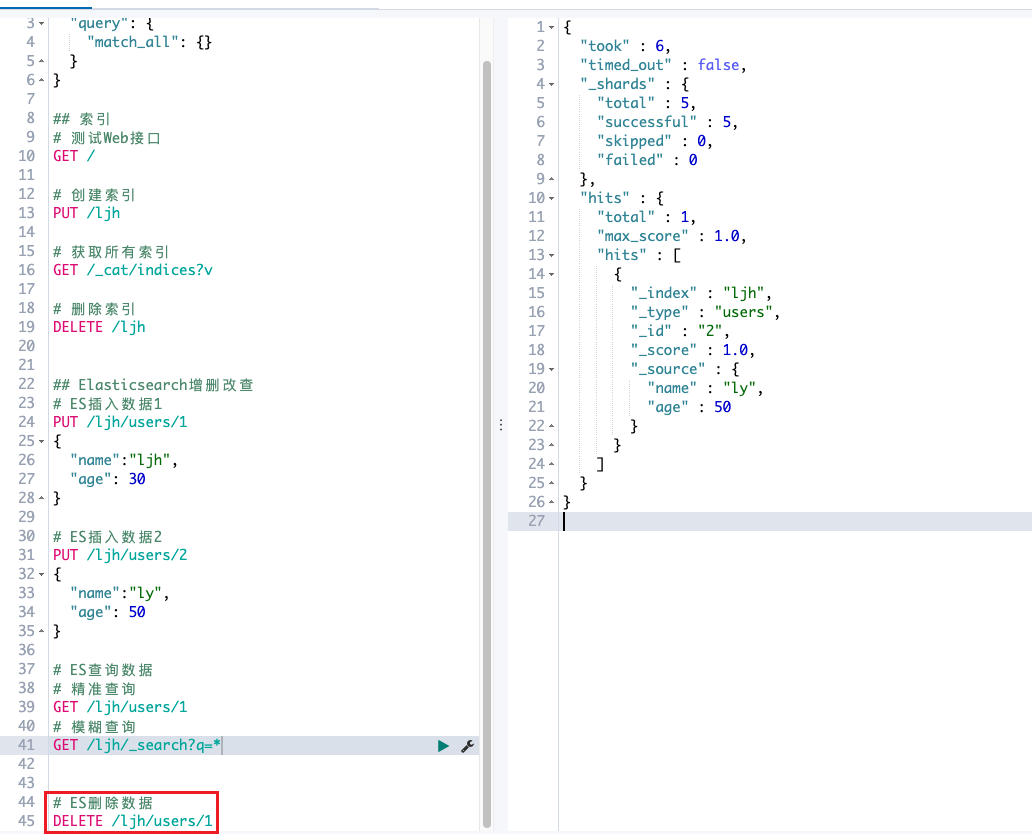
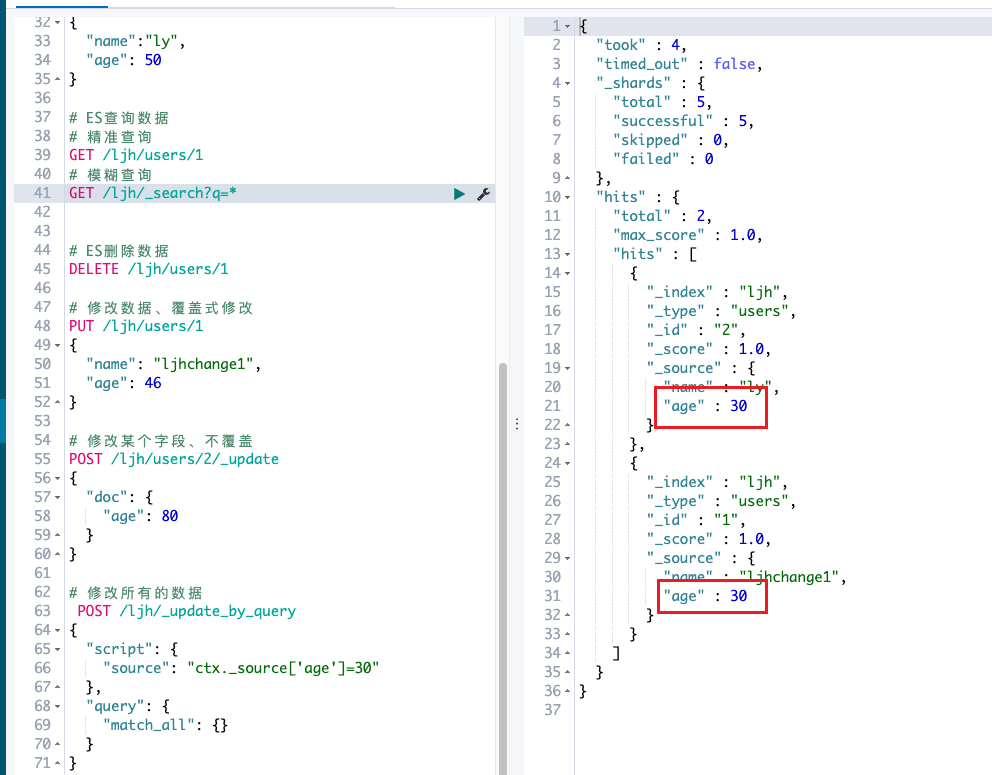
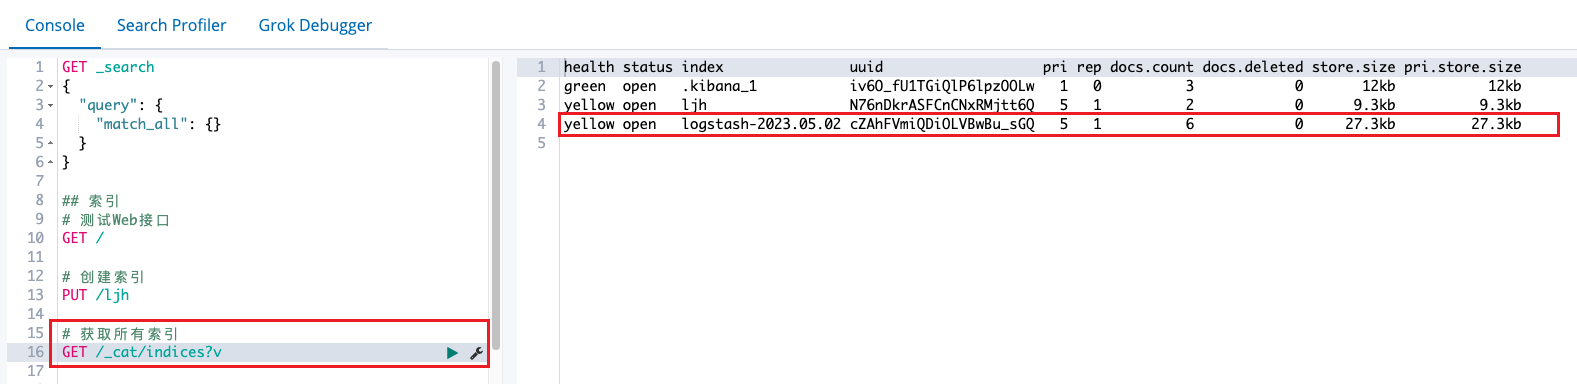
首选插入一条数据到/ljh/users/2 "name":"ly" "age": 50,模糊查询/ljh 下的所有内容,以列表形式展示
GET /ljh/_search?q=*
PUT /ljh/users/1
{
  "name": "ljhchange",
  "age": 46
}
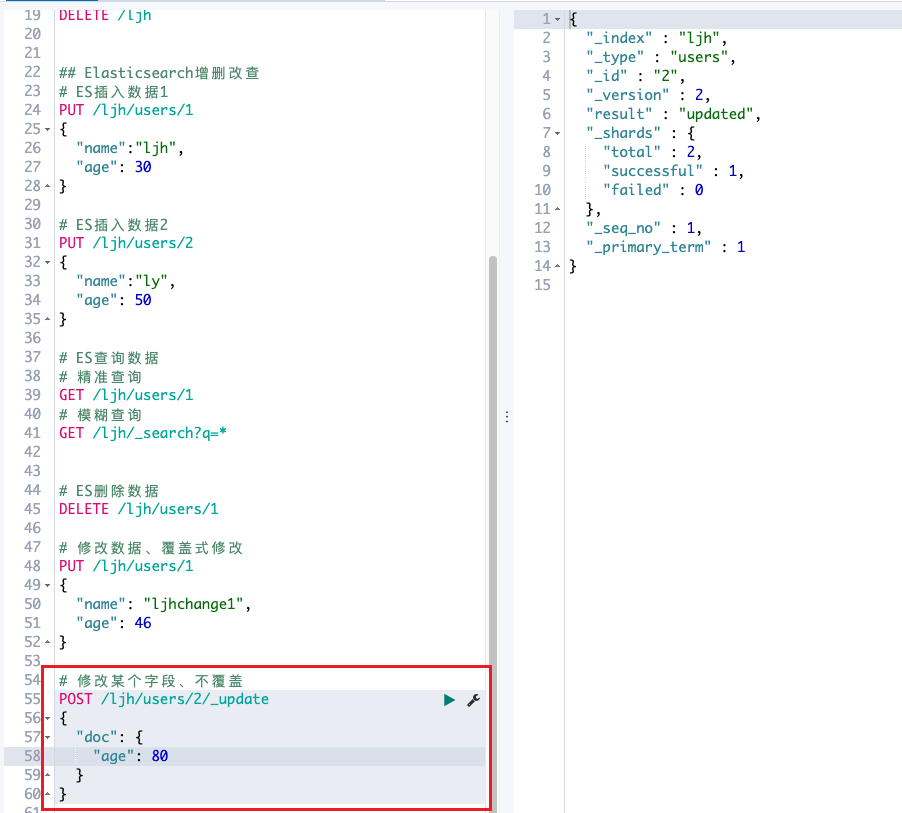
POST /ljh/users/2/_update
{
  "doc": {
    "age": 29
  }
}
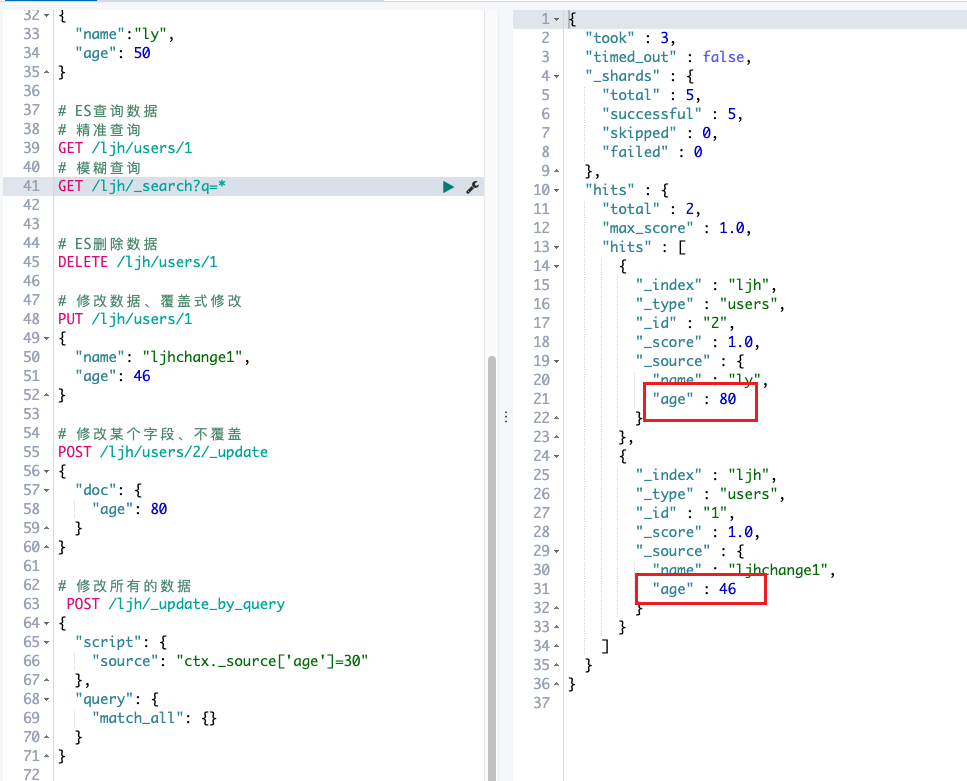
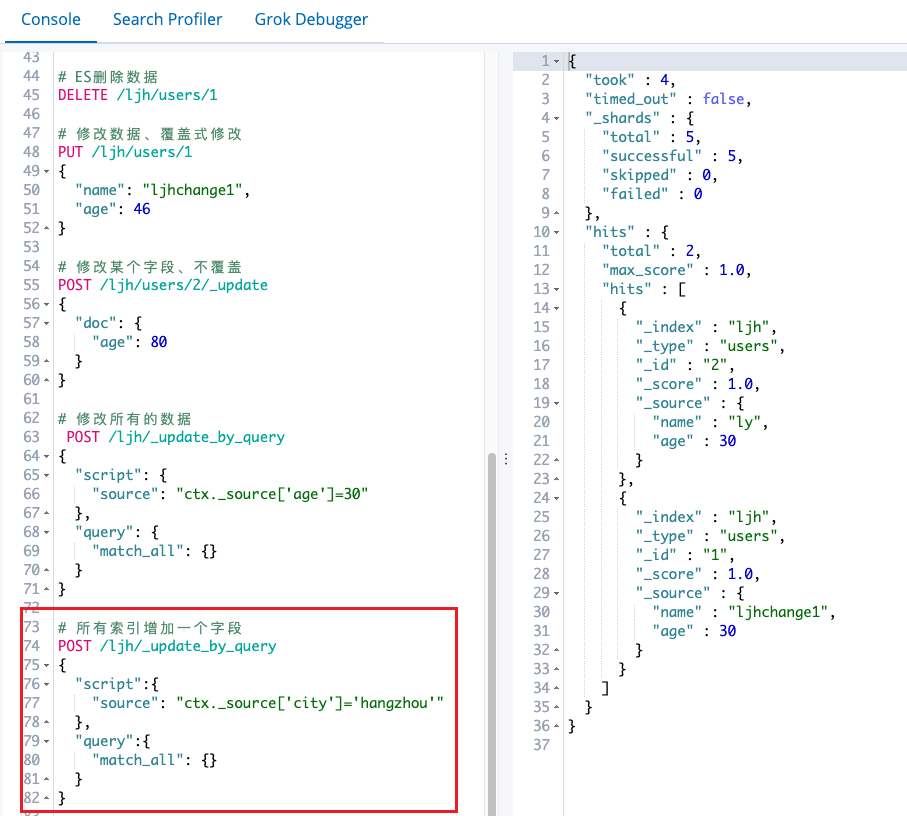
POST /ljh/_update_by_query
{
  "script": {
    "source": "ctx._source['age']=30"
  },
  "query": {
    "match_all": {}
  }
}
修改后:
POST /ljh/_update_by_query
{
  "script":{
    "source": "ctx._source['city']='hangzhou'"
  },
  "query":{
    "match_all": {}
  }
}

Logstash二进制安装和启动
Logstash的安装
安装命令
tar -zvxf jdk-8u201-linux-x64.tar.gz
export JAVA_HOME=/usr/local/jdk1.8.0_201/
export PATH=$PATH:$JAVA_HOME/bin
export CLASSPATH=.:$JAVA_HOME/lib/tools.jar:$JAVA_HOME/lib/dt.jar:$CLASSPATH
source /etc/profile
tar -zxf logstash-6.6.0.tar.gz
Logstash的JVM配置文件更新/usr/local/logstash-6.6.0/config/jvm.options
Logstash最简单配置,用于测试/usr/local/logstash-6.6.0/config/logstash.conf
input{
  stdin{}
}
output{
  stdout{
    codec=>rubydebug
  }
}
- yum install haveged -y; systemctl enable haveged; systemctl start haveged # 速度调优
- 前台启动:/usr/local/logstash-6.6.0/bin/logstash -f /usr/local/logstash-6.6.0/config/logstash.conf
- 后台启动:nohup /usr/local/logstash-6.6.0/bin/logstash -f /usr/local/logstash-6.6.0/config/logstash.conf >/tmp/logstash.log 2>/tmp/logstash.log &
- 测试标准输入和输出

Logstash读取日志/usr/local/logstash-6.6.0/config/logstash.conf
input {
  file {
    path => "/var/log/secure"
  }
}
output{
  stdout{
    codec=>rubydebug
  }
}
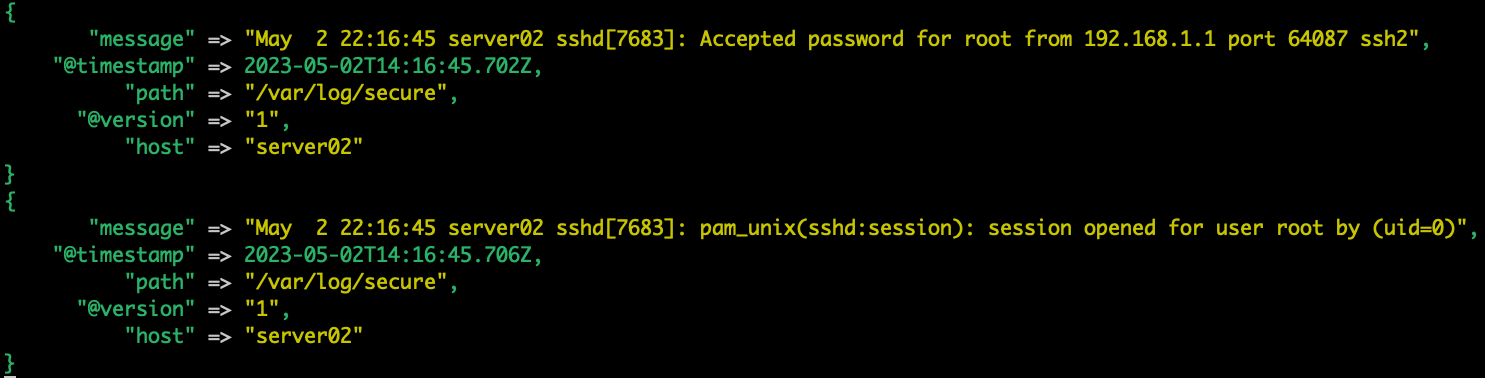
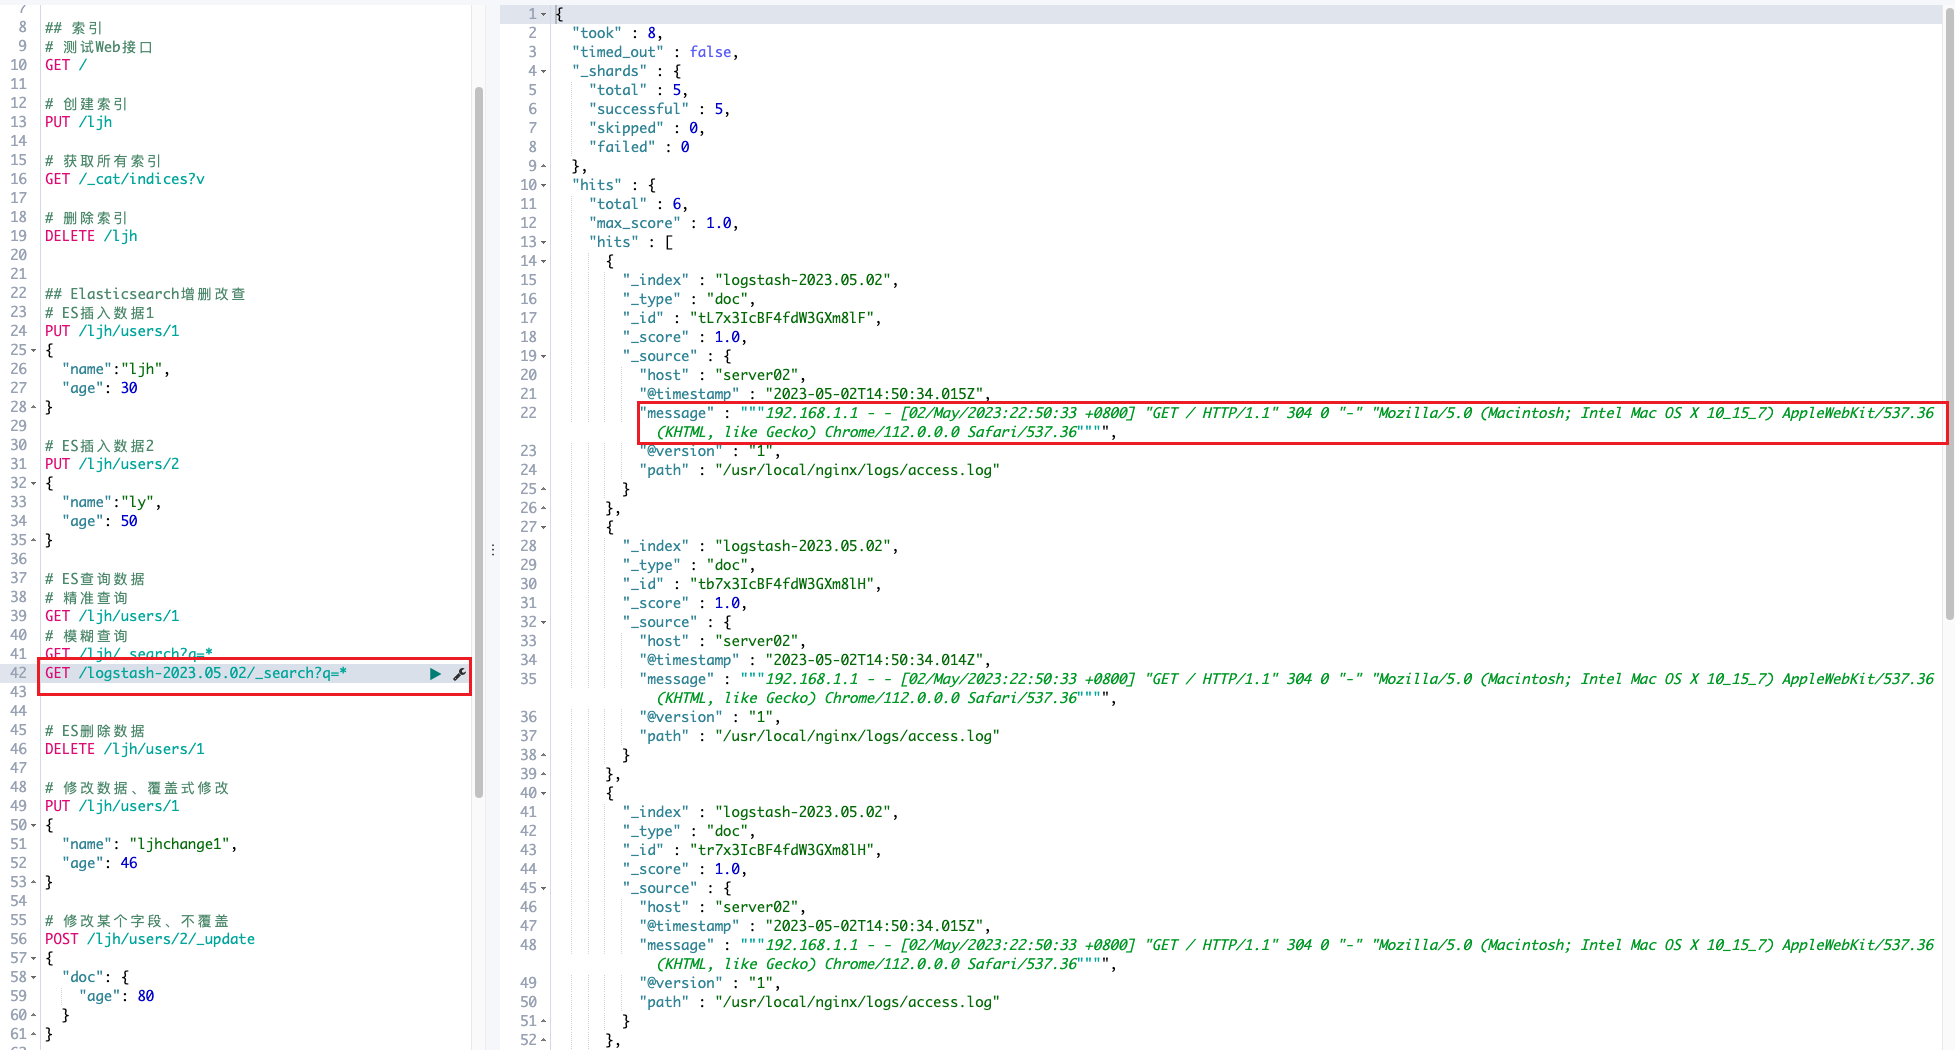
Logstash读取日志发送到ES
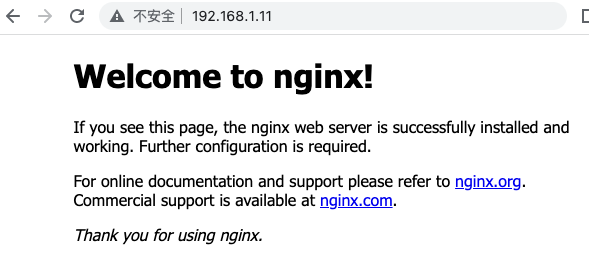
server02安装一个nginx ,开启nginx,将nginx的访问日志推送到logstash
Nginx编译安装
yum install -y lrzsz wget gcc gcc-c++ make pcre pcre-devel zlib zlib-devel
# wget 'http://nginx.org/download/nginx-1.14.2.tar.gz'
./configure --prefix=/usr/local/nginx && make && make install
export PATH=$PATH:/usr/local/nginx/sbin/
开启nginx:nginx
Logstash配置发送日志到ES数据库/usr/local/logstash-6.6.0/config/logstash.conf
input {
  file {
    path => "/usr/local/nginx/logs/access.log"
  }
}
output {
  elasticsearch {
    hosts => ["http://192.168.1.10:9200"]
  }
}
nohup /usr/local/logstash-6.6.0/bin/logstash -f /usr/local/logstash-6.6.0/config/logstash.conf >/tmp/logstash.log 2>/tmp/logstash.log &
在Discover界面查询
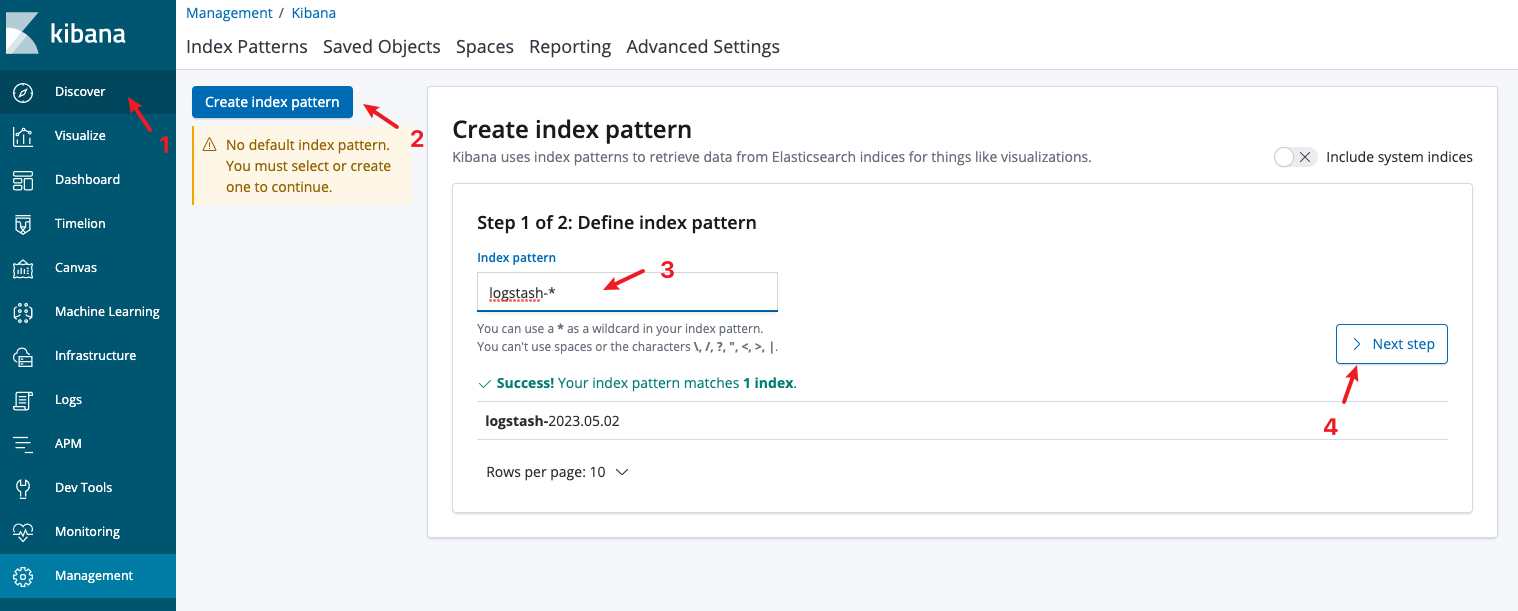
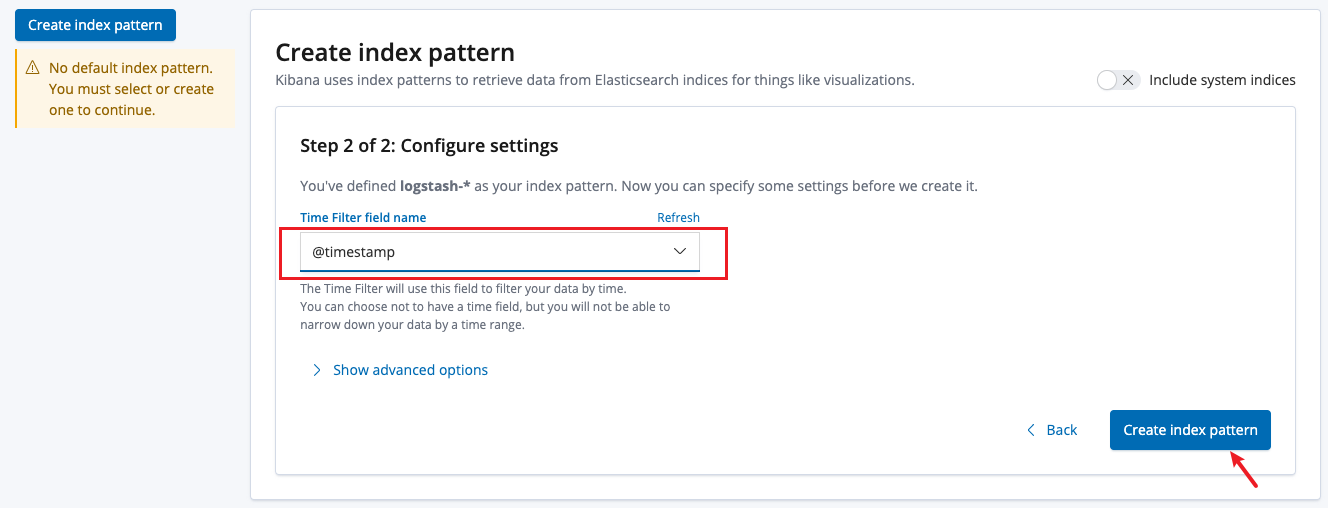
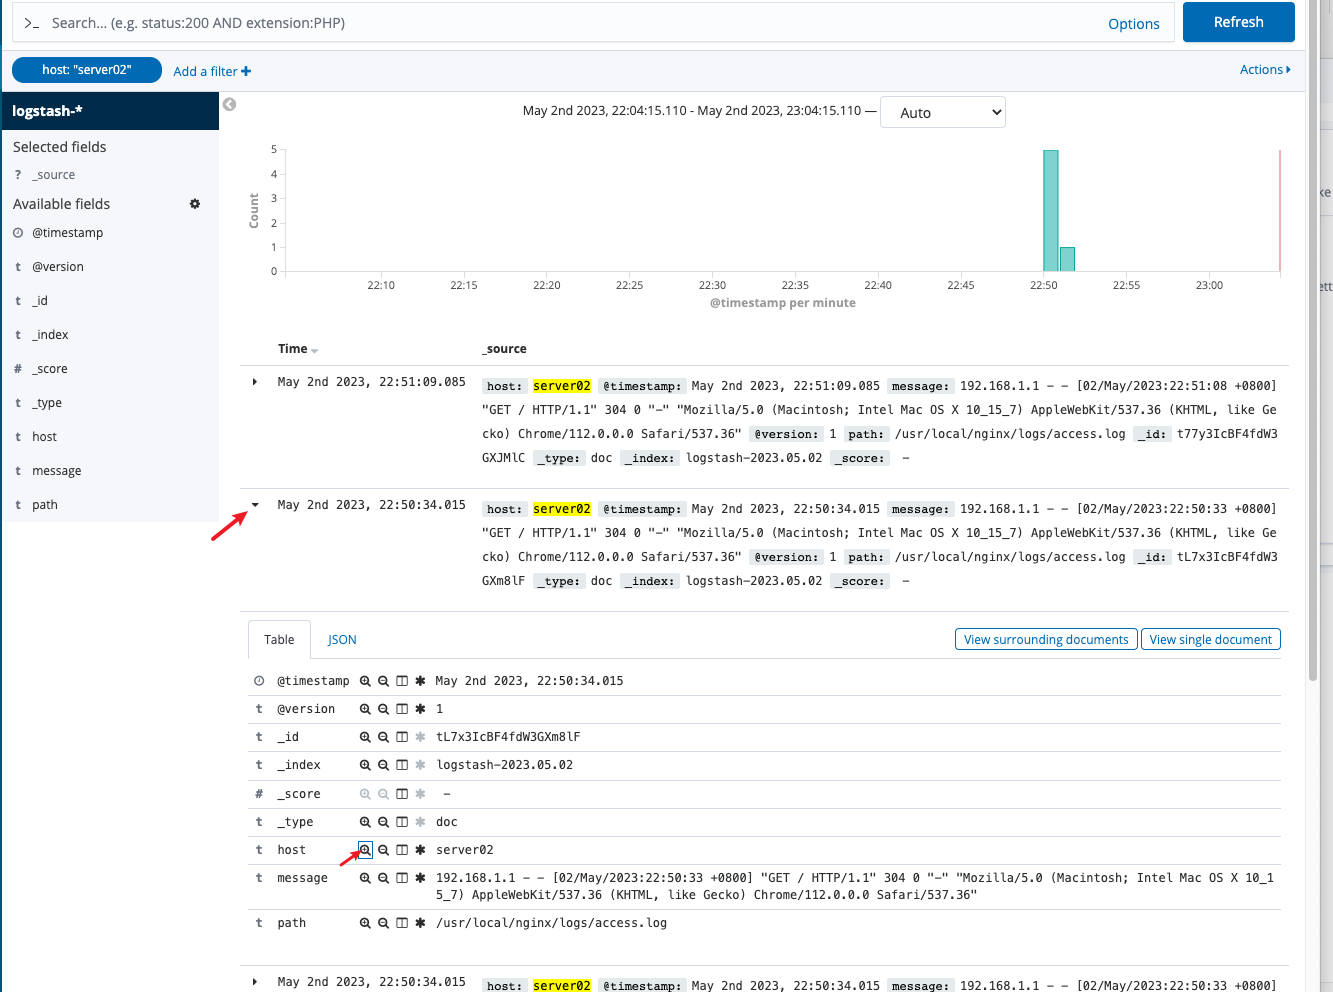
Logstash读取日志 -> ES存储数据 -> Kibana展现
发布者:LJH,转发请注明出处:https://www.ljh.cool/37036.html